Basics of a Leko

Lekolite, most commonly known as a Leko, is light that uses an ellipsoidal reflector to reflect light through a lens that then focuses the light. They are used heavily in theatre and are great for precision lighting.
This light looks complex, but once we break it down it is very simple. We’ll be using a SourceFour Leko as our example, but the parts are generally consistent with all Lekos.
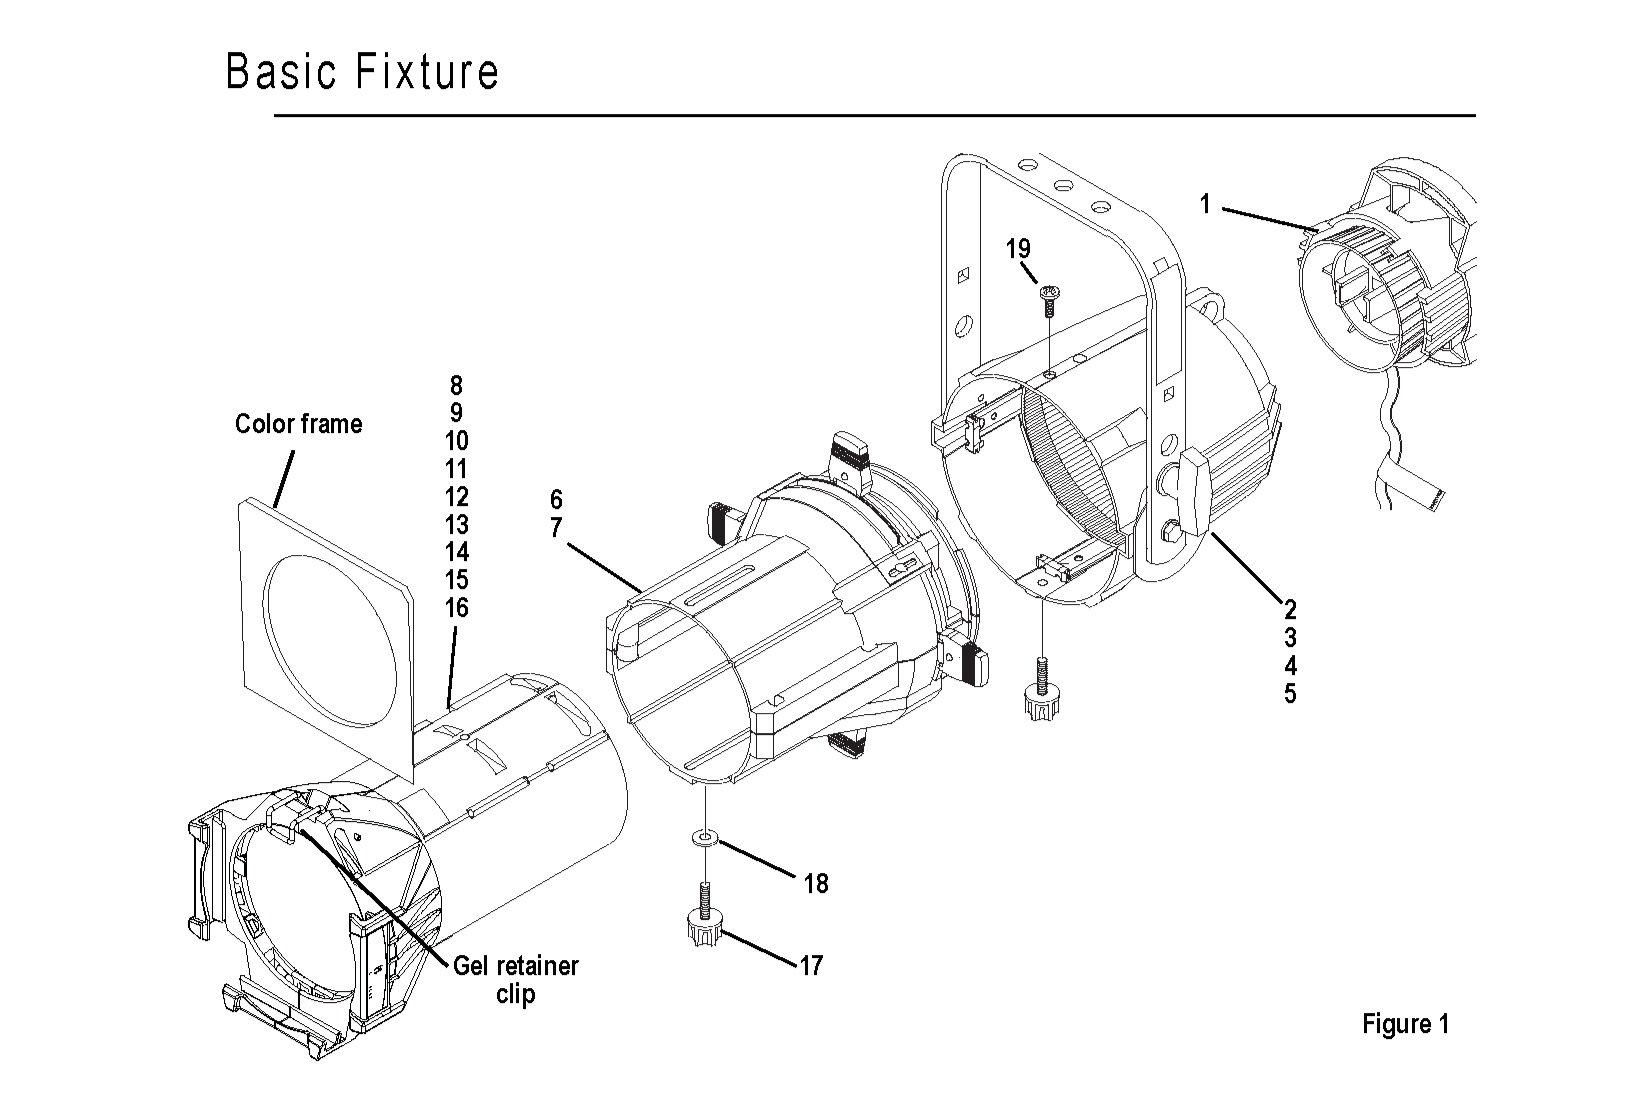
Diagram from ETC
Lekos have 4 main parts: the lamp housing, the reflector housing, the lens train (commonly known as the barrel), and the lens itself.
Lamp Housing: This is where your light source comes from, it could be a conventional lamp or LED.
Reflector Housing: This houses the reflector, but also includes a safety cable loop, the fixture’s yoke to attach the clamp, and the barrel lock thumb screw.
Lens Train: This has shutters on it so you can shutter the light down and bring it to a spot, a gobo holder slot, an accessory slot to hold things like a gobo rotator or an iris, and a focus lock thumb screw.
Lens: The lens can take two gel frames and has a lock so they don’t fall out, it also has a degree marking so you know what degree the lens is.
Replacing a Blown Lamp
Let’s go over how to change the lamp! First, make sure the fixture is unplugged from power. There is a thumb screw on the top of the lamp housing, you’ll want to loosen that and remove the lamp housing gently and completely from the fixture.
You’ll see a metal tension clip holding the lamp inside, if you squeeze the non-hinged side together, it will come free and you can swing that guard out of your way. With the next step, you should preferably do it with a set of gloves. You’re going to grab the base of the lamp and pull it free. Sometimes it can be a little difficult, so you just have to give it a little wiggle. Please be sure not to slip and grab the lamp itself, you don’t want to break it and have to clean up glass or cut yourself.
Lastly, you’ll stick the new one in, but be sure not to touch the lamp or the oils from your skin will cause it to go bad once hot. Check the wattage to make sure it is what you want and is below the rating on the lamp housing. Make sure to press the base down until it is flush with the lamp housing and put the tension clip back into place.
Please note; the higher-wattage 750W lamps will have an additional locating pin that you’ll need to line up within the lamp housing.
Place the lamp housing back into the leko and tighten the thumb screw.
Gobos
Gobos are such a great way to add some personalization to your space, whether it's for a wedding, your production, or your play. They can display anything you want, you can start with a steel gobo, and if you want multiple colors you can upgrade to a glass gobo.
To put these into the fixture, you’ll want to put it in the gobo holder backwards and upside down.
If you have a glass gobo, you’ll need to use a glass gobo holder which looks similar to the steel gobo holder, but is thicker. Glass gobos also have an orientation in which they need to be placed in the fixture. Around the rim of the gobo it states “This side towards lamp”, be sure to do that correctly or you will ruin the gobo.
Most of the time, after putting the gobo into the fixture, it will be fuzzy. To focus on it, you’ll want to loosen the thumbscrew on the lens. Moving the lens in and out of the fixture, you’ll notice it will come in and out of focus.
Lekos are very versatile fixtures and hopefully, this helped you learn more about the basics! If you are a visual learner or want to learn more about focusing, shutters, and differences in lenses, check out our YouTube video linked below!